Members Page Overview
Note: Editors and contributors are able to access the members page but are not able to perform any actions on the page including editing, adding, or deleting members and groups.
All Members Tab
You can access the members tool by clicking the members icon  in the top navigation bar.
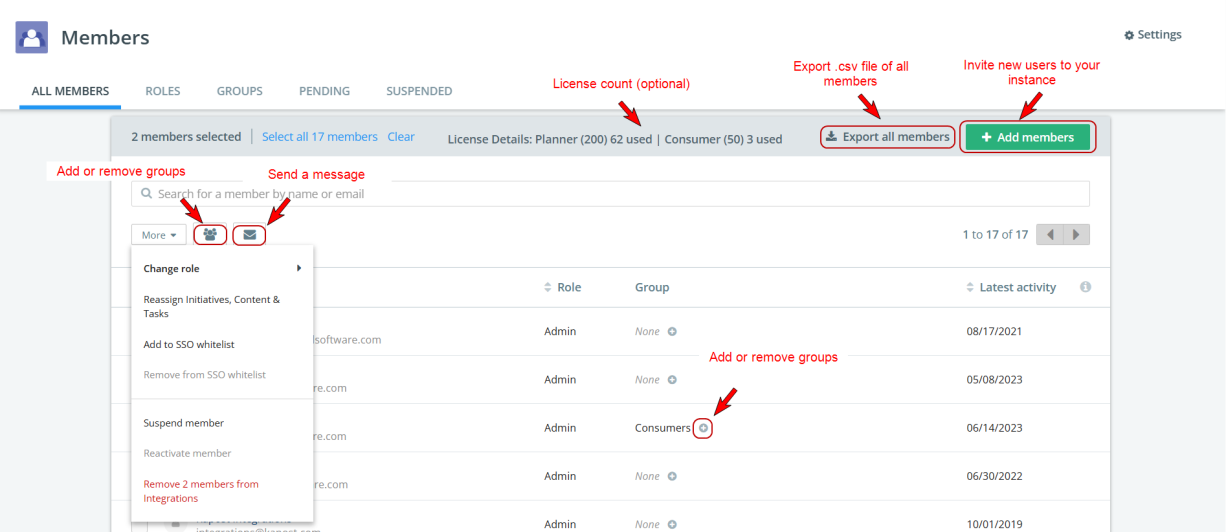
This icon directs you to the all members tab where you will see a list of Kapost members in your instance. By default, the list is in alphabetical order, but can also be sorted by role, or by latest activity. You can use the search bar to look for a specific username or email.
Note: The total number of members on this tab does not include pending users.
When you select one or more members by checking the box next to their name, the following actions become available:

- More:
- Change role
- Select this option to change the role of a current member.
- Reassign initiatives, content, & tasks
Note: The reassign action is not available for consumer or source roles because they are not associated to content, initiatives, or tasks.
- Add or Remove from SSO whitelist (only available if SSO is enabled)
- Remove from instance
Note: Org members cannot be removed from a child instance and their role cannot be changed from a child instance. These actions will need to be completed from the org members page.
- Change role
- Suspend a member
- Reactivate a member
- Remove a member
- Send a Message:
- Create a message that will be sent via email to the members you have selected
- Add or Remove Groups:
- Add selected member(s) to any pre-existing group by checking the box next to the group
- Remove selected member(s) from a group by unselecting the checkbox next to the group
- Add a new group to your instance by clicking + Add a new group..
- Add Members
- Invite members that do not currently belong to your instance by selecting + Add Members
- Customize this invite by selecting a role for the new member(s) and by adding a subject line and message to the email
Note: A standard subject and message will be included by default but can be overridden by updating text.
- Once sent, the invited member will show up in the Pending tab until they accept their invite
- Export All Members
- A link to download a .csv file containing all members in your instance will be emailed to you within a few minutes.
Note: Export includes pending members.
- A link to download a .csv file containing all members in your instance will be emailed to you within a few minutes.
- License Count
- Admins have the ability to view the license count details and usage.
Note: Reach out to your CSM for further details and to enable this feature in your instance.
- Admins have the ability to view the license count details and usage.
Roles Tab
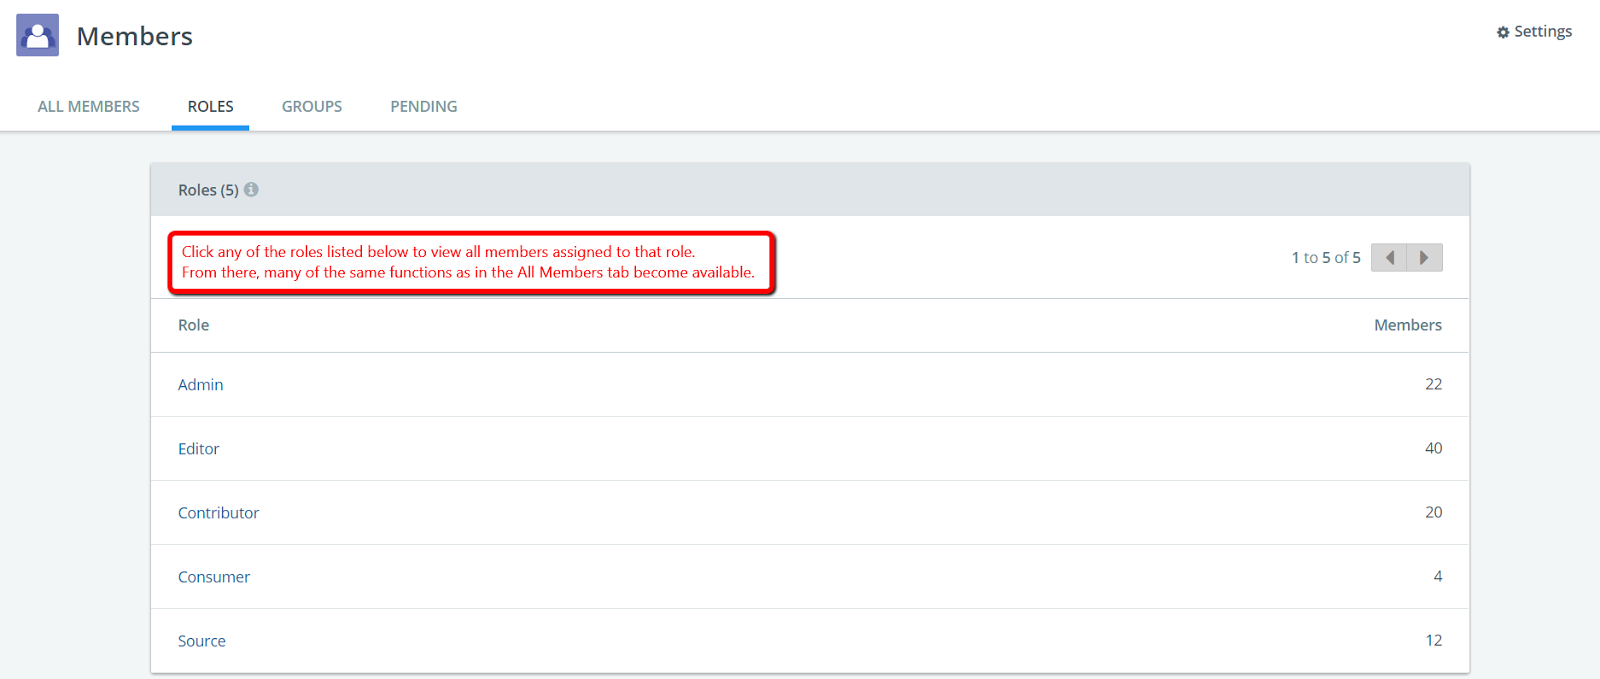
The Roles tab gives you visibility into the number of members assigned to each role. Roles determine what users are able to do in the system.
- Admins have the highest level of permissions and can access and manage everything in the Kapost instance including all settings
- Editors are able to access everything in Kapost except settings.
- Contributors can only access items they own, have assigned tasks on or have been granted visibility on
- Consumers are users of the Gallery only. They can view, share and download content but are unable to access other parts of the app
- Sources represent anyone who has submitted an idea through the crowdsource form. Source users do not have logins and cannot access anything in Kapost
For more detailed information on member roles, click Member Roles And Responsibilities.
By selecting a role from this tab, you can view a list of all members assigned to that role. From this list, you can complete the same actions available on the Members tab.

Groups Tab
The Groups tab allows you to organize your members, groups can be leveraged in different areas of the app. Users are commonly grouped by department or team.
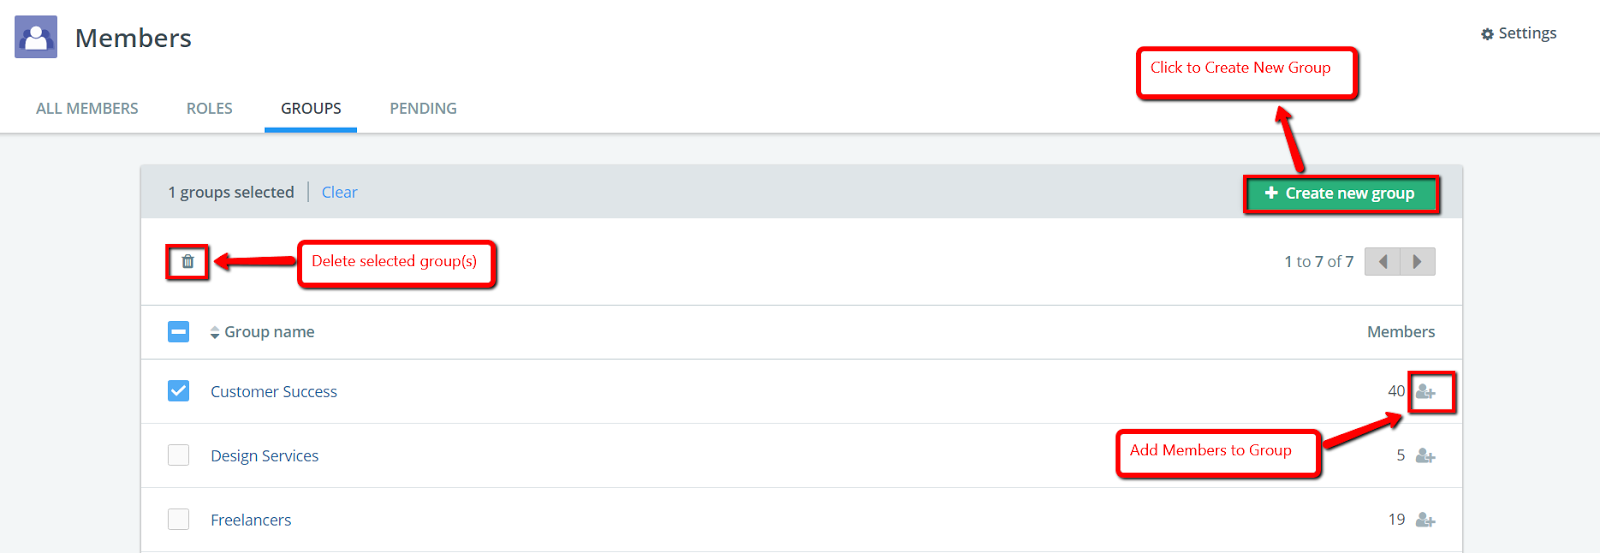
When you navigate to the Groups tab, you will see a list of all existing groups. Create a new group by clicking + Create new group or delete group(s) by checking the box next to a group then clicking the trashcan icon. To add members to a group, click the icon on the right side of the row corresponding to that group and search for the users you would like to add.
By selecting a group from this tab, you can view a list of all members who belong to the group. From this list, you can complete many of the same actions available on the Members tab.

Pending Tab
The Pending tab shows a list of users invited to your Kapost instance by an admin who have not yet logged in or set up their passwords. The list also shows users who have requested access to your Kapost instance.
If a user has requested access, you can view the message included in the request. You can approve users which grants them access and sends them an invite by clicking Approve in the row or from the More menu.
Users who have been sent an invite will display on this page until they login. Invites can be re-sent by selecting Re-invite in the row or from the More menu.
The option to upload a CSV file to add mumber names in bulk is available at the bottom of the Add Members screen. Refer to Bulk Member Upload for more information on creating a CSV for upload.
Many of the same actions available on the Members tab are available for pending users including updating roles and groups.
Suspended
If a admin has changed the member status of a user to suspended, their name will appear in the suspended tab along with the date the suspension occurred. For more information, refer to the Suspend Or Remove Members section.
Membership Settings
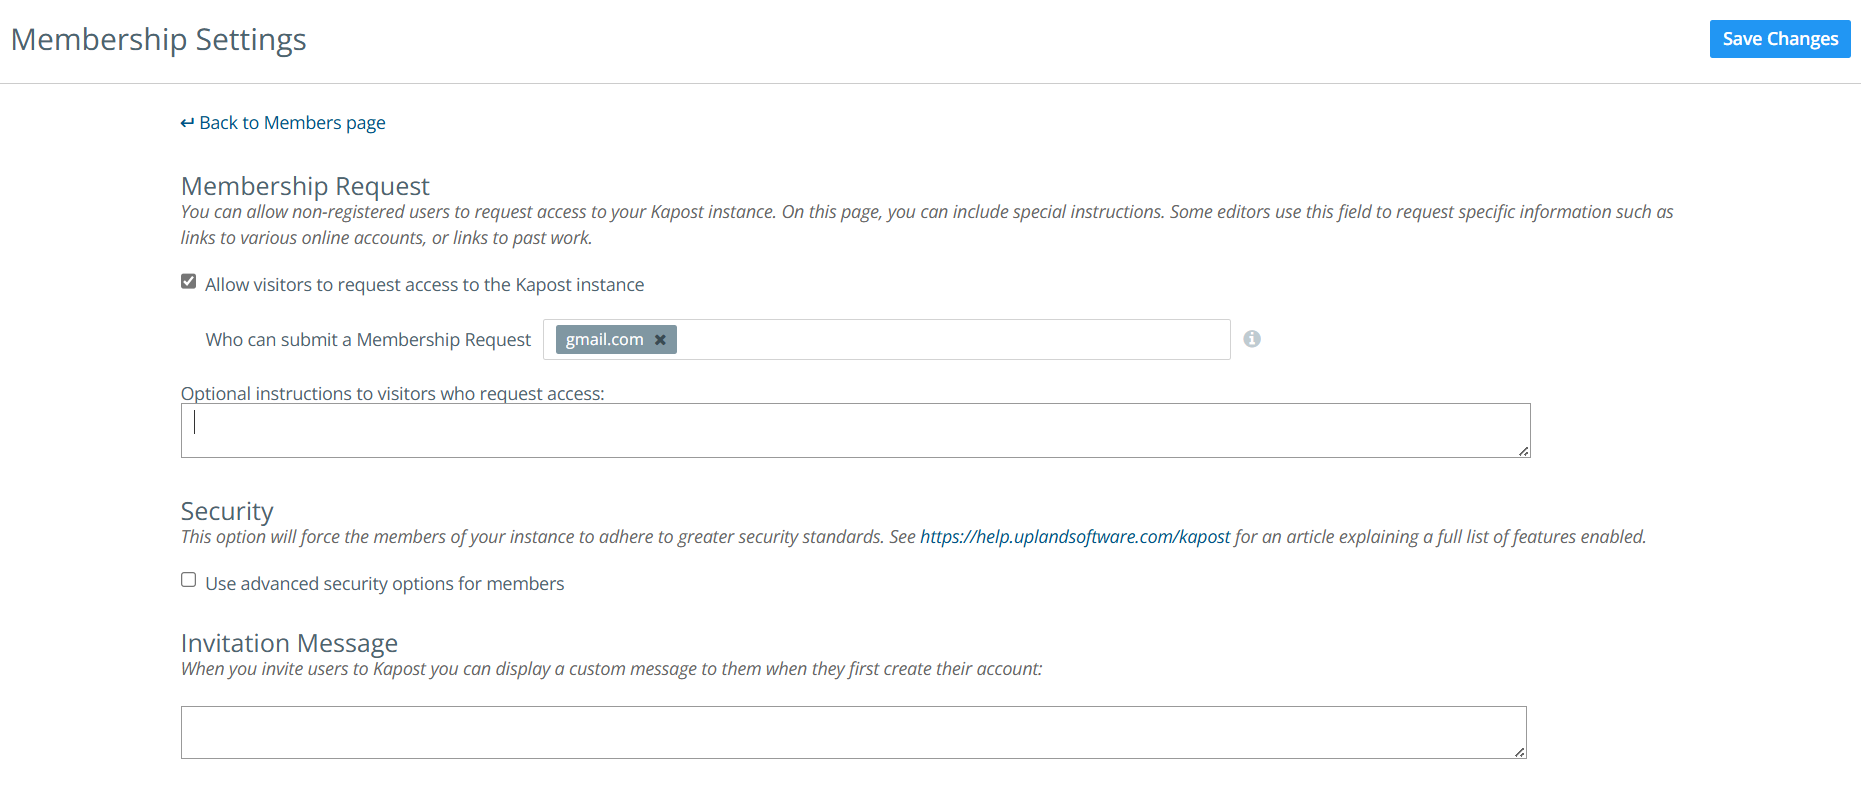
On the membership settings page you can adjust who should be able to request access to Kapost, manage advanced security options, and update the invite message sent to new users.

Membership Request:
-
Admins can allow non-invited users to request access to your Kapost instance. Enabling this option allows them to send a message to the instance admins, who can then review and approve their requests. To enable this functionality, the admin must select the checkbox A user requests access to Kapost in the Email Settings page.
-
Approve Request: When a non-licensed user requests access to Kapost, the admin can approve the request by navigating to the Pending tab on the Members page.
-
Admins can specify which domains are allowed to submit membership requests by entering the domain(s) in the empty field. If no domains are specified, membership requests are open to all.
-
In the Optional instructions to visitors who request access section, admins can provide specific guidance or instructions for visitors submitting membership requests.
-
- Security:
- This option will force the members of your instance to adhere to greater security standards. Advanced security is a billing feature that should be discussed with your Customer Service Representative if you are interested. See this article for more details.
- Invitation Message:
- When you invite users to Kapost you can display a custom message to them when they first create their account. This message is different from the optional personal message available when the invitation is initially sent.